|
|
Web Hosting by Netfirms | Free Domain Names by Netfirms |
|
These lessons are aimed at giving a short series of easy instructions on learning to use DISCOURSE PROFILER from the beginning, step by step. For an overview of the DISCOURSE PROFILER program, its features and capabilities, I recommend the user review the powerpoint program first.[1]
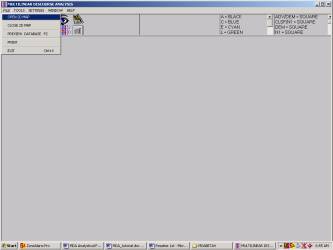
In this lesson the user will become familiar with the main visual features of the 2D Map. To do this you will use one of the sample DISCOURSE PROFILER database files. After installing the program, locate the DISCOURSE PROFILER application file name MDA_B4_A.exe if its not already on your desktop (if not yet on your desktop you can create a shortcut icon there). The default folder name is MDABETA4. Double click to run the program. You should now see something similar to the following screen capture. Most of the program below the tool bar will appear blank when you first open the program.

The next step is to open the menu FILE and choose option OPEN 2DMAP. This is shown in the next screen capture.
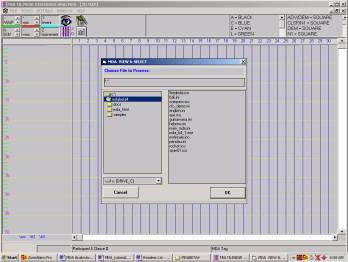
After clicking on OPEN 2D Map option you will be asked to select a file. This dialogue box will show a view of files and folders. You will also notice that the background has loaded an empty display of the 2D Map, and in a few moments we’ll discuss this once we’ve opened a sample file.
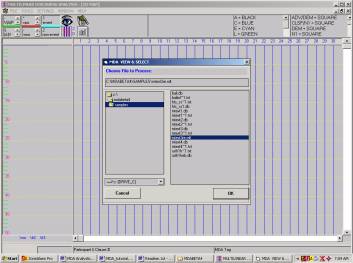
If it has not opened in the default folder location of MDABETA4, find that location. Now select the folder named samples. Here there will be a list of files with extensions: *.txt, *.db, *.mlt. These are all text files, however those with the extension *.db are shoebox/toolbox database files. Those with *.txt and *.mlt are equivalent DISCOURSE PROFILER database files. Don’t worry yet if this is not clear, later lessons will systematically take you through how each of these file types are used. For now select the *.mlt file (mlt takes the first three consonants from Multilinear). You’ll notice that the whole name is now in the top text box.
Now click the OK button. The following screen should now appear. This display visually represents the first 50 clauses of one Southeast Asian text.
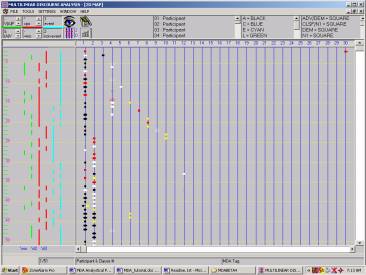
To discuss what the user sees here, we first need to have some terminology to refer to the display. The most prominent portion of the display has 30 vertical blue lines criscrossed with dotted yellow lines. This will be referred to as the ‘MAP’ or ‘2D Map’. Each of the vertical blue lines typically represents one unique participant in a text, and these are used for basic participant tracking. The area immediately to the left of the 2D Map has three sets of vertical broken lines in three colors (green, red, and cyan). This area also has numbers, tick marks which will be used to identify clauses. The numbers and yellow horizontal line indicate every fifth clause. This left area of the screen will be referred to as the ‘slate’. The slate is used primarily to show the span analyses parallel to the participant tracking (if you’re not familiar with what a span analysis is, this will be explained in a later lesson).
There are two more areas that are above and below the 2D Map and slate areas. The bottom area provides some small text boxes that provide status information of the current text display. These will be discussed later. The area just below the menu (near the top), sometimes called the ‘toolbar’, includes four icons which contain the four main tools, including an icon for opening the 2D Map. To the left of these four icons are six list boxes. These list boxes are in pairs to help the user identify information in the span analyses that are tracked in the slate. The three list boxes to the right contain a list of the participants (near the middle), and two smaller list boxes which identify the meaning of the colors and shapes (according to what the user has set up).
Now we will move on to the last topic of this first lesson. An important part of this lesson is learning about using the mouse and how it helps in interactive analysis of a text. Take the mouse into the 2D Map area. You will notice that it is no longer an arrow icon, but it looks like a cross-hair. Try clicking on the left mouse button and holding it down. You should now see these cross-hairs become a color green and extended from top to bottom of the 2D Map, and from left to right covering both the slate and 2D Map. Try moving and/or clicking the mouse onto one of the symbols. The green cross-hairs should now completely overlap a particular participant and a particular clause line. If you begin scanning the various list boxes at the top and bottom you may note that some of the list boxes have highlighted some of the entries.
First move click and hold the left mouse button down and move the mouse from left to right while you watch the list box with the list of participant names.[3] You will see that as the cross-hairs of the mouse change from one participant to another that the listbox is continually updated to match the participant.
Finally, the last step in this lesson is to close the 2D Map. To do this choose the FILE option and select the menu optioon CLOSE 2D MAP. The visual interactive area will close, but the program will remain active to return to the 2D Map or to use other features. To exit the DISCOURSE PROFILER program, choose EXIT from the FILE menu options
[1] Note that MDA is the abbreviation for the former name Multilinear Discourse Analysis. The program is in transition to the new name Discourse Profiler. Therefore you will still see the previous name in some places or its abbreviation, MDA.
[2] Note that this lesson assumes that none of the files have been modified. If the user has already explored some of the sample files, some of the setting files may have changed. In order to restore the settings to their initial default settings, copy the Pendau.ini file from the INIBACKUP folder to the MDABETA4 folder.
[3] These are listed generically as Participant 1, Participant 2 (and so on) in the initial loading of a text. Note however that the user has the option to specify the names of participants. This will be discussed in a later lesson.